This post may contain affiliate links. As an Amazon Associate, I earn a commission on qualifying purchases at no extra cost to you.
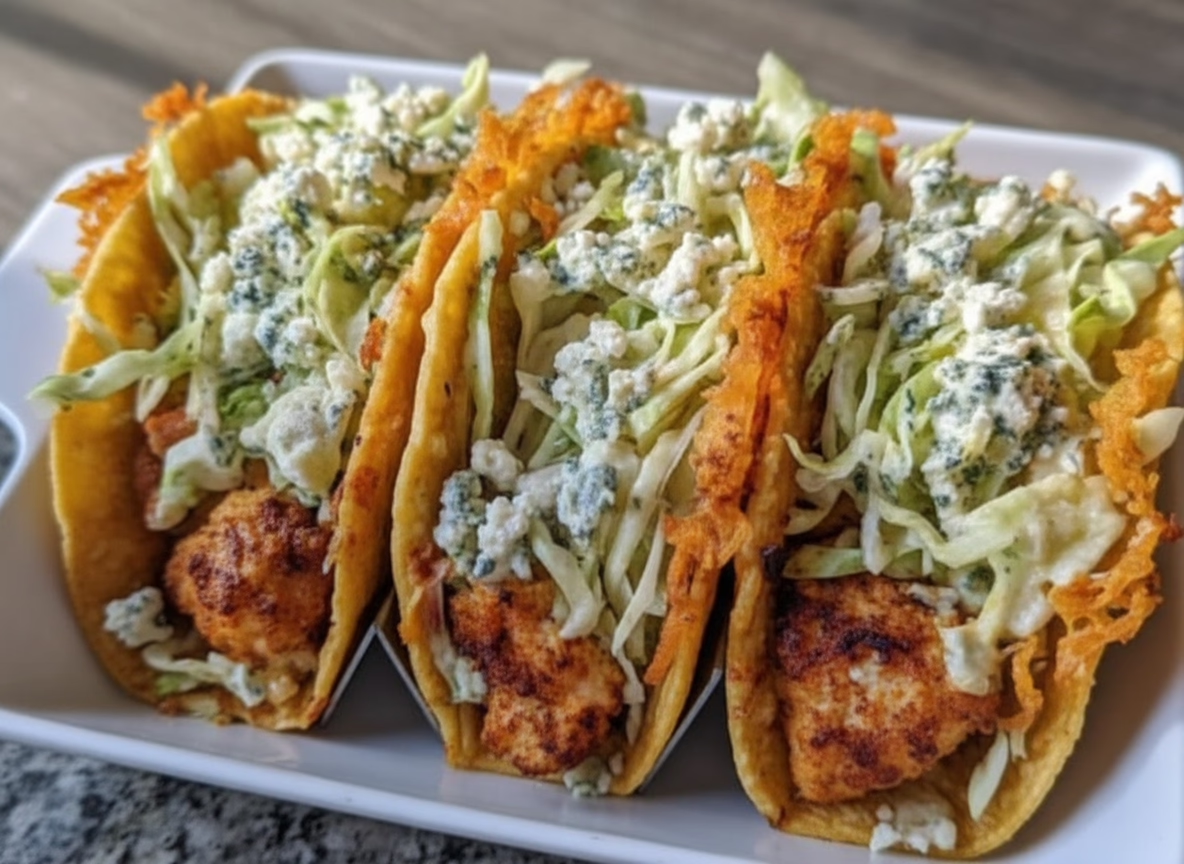
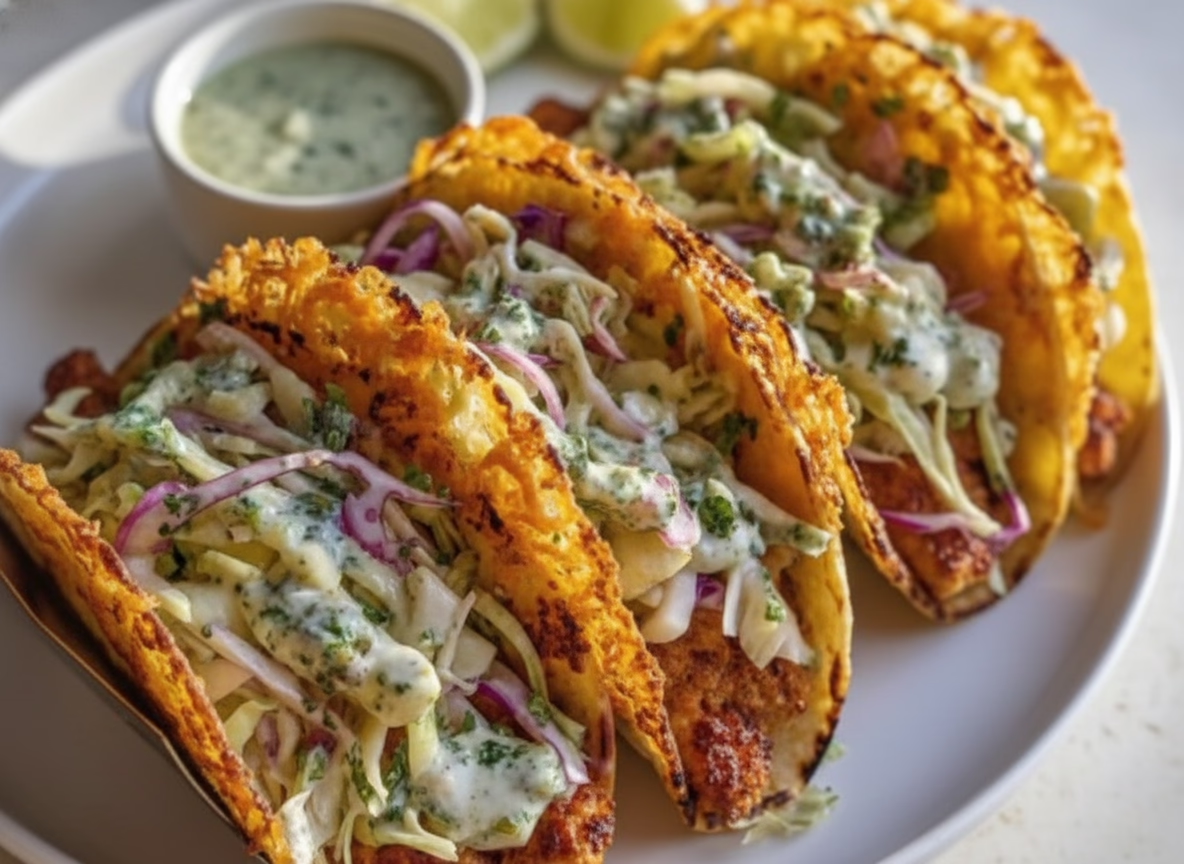
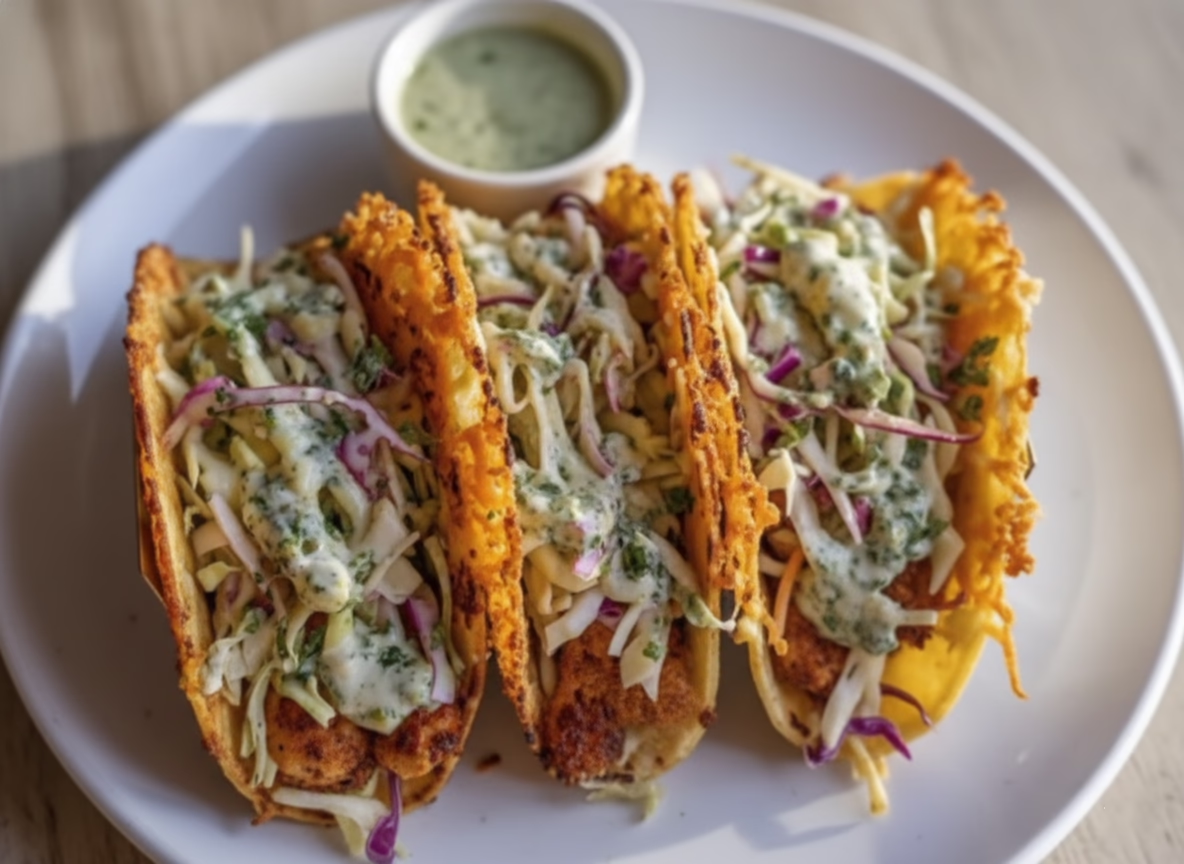
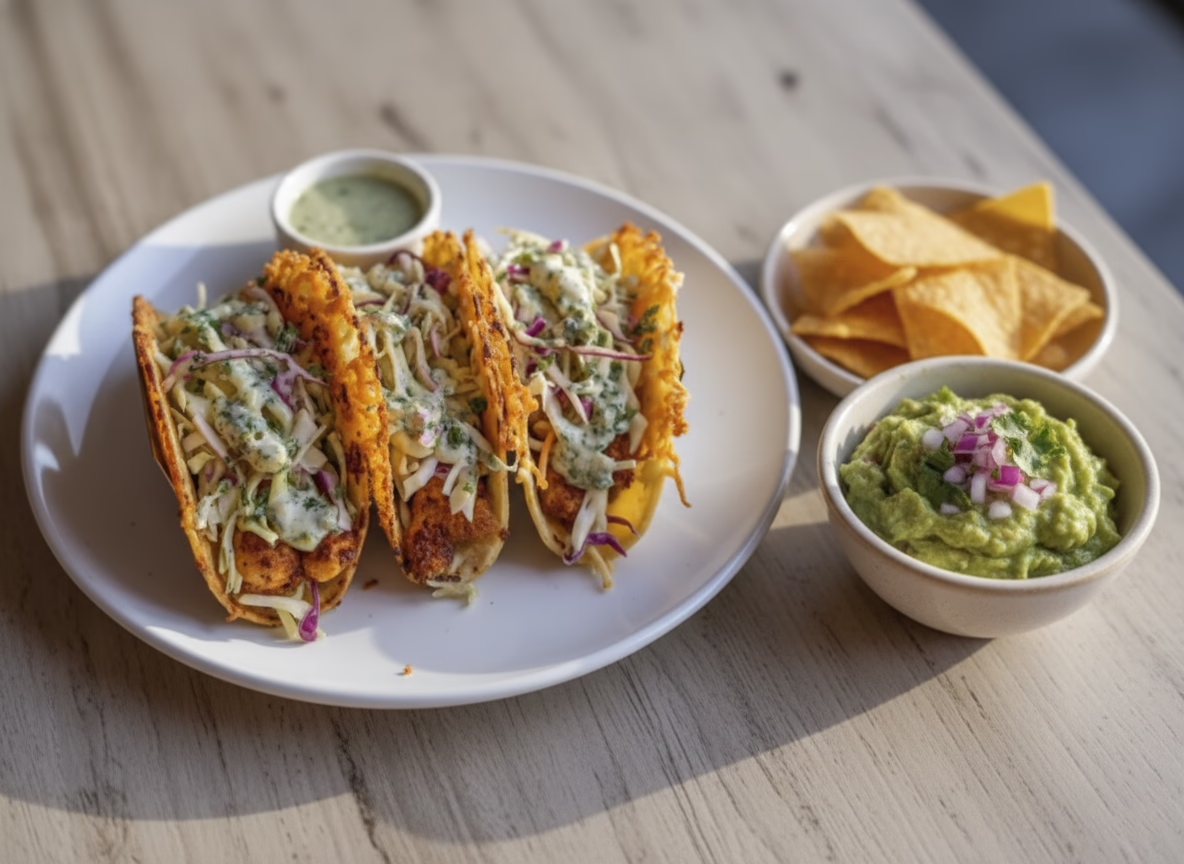
Okay, friends, let me tell you about a taco that will absolutely rock your world. We’re talking about a crunchy, tangy, cheesy, and incredibly satisfying flavor bomb that comes together faster than you can order takeout. These Dill Pickle Ranch Smash Chicken Tacos with Crispy Cheese are not your average Tuesday night tacos. They are a crispy, golden, pickle-ranch dream where the cheese itself becomes part of the crunchy shell. Imagine a pan-fried tortilla, loaded with a creamy, tangy chicken and pickle mixture, all glued together by a lacy, golden-brown cheese crust. Yes, please. Whether you are a pickle fanatic or just someone looking for a new, fun weeknight dinner, this recipe is going to become an instant classic in your kitchen.
Why you’ll love this Dill Pickle Ranch Smash Chicken Tacos
A perfect crunch in every single bite:
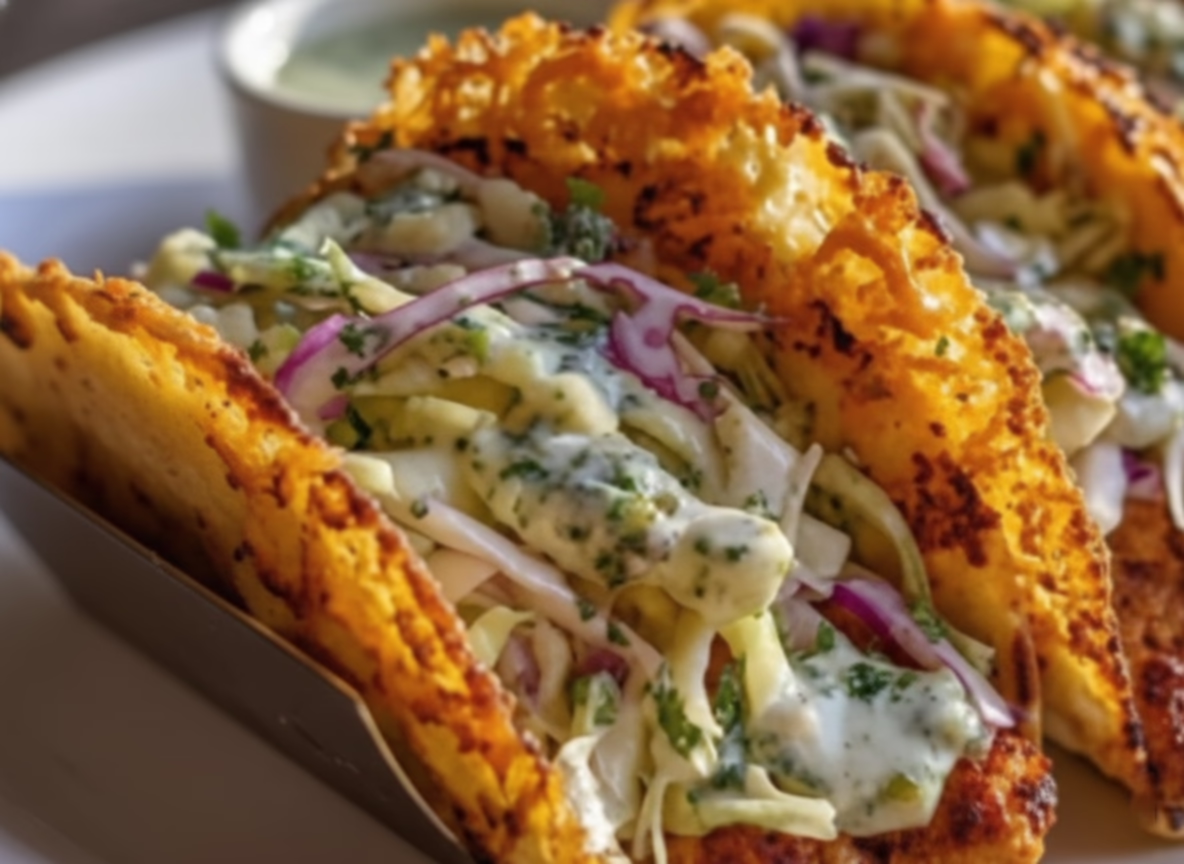
Forget soggy tacos. This recipe delivers a multi-layered crunch. The cheese, when fried directly on the pan, creates a crispy, almost cracker-like shell that shatters beautifully as you bite into it. The tortilla gets toasted and sturdy, while the chicken mixture stays creamy and cool. It’s a textural symphony.
That bold, tangy, crave-worthy flavor:
The combination of dill pickles and ranch seasoning is a match made in heaven. It’s tangy, it’s herby, it’s creamy, and it’s got that irresistible briny punch that makes you want to take another bite before you’ve even finished the first one. It’s the kind of flavor that makes you wonder why you haven’t been putting pickles in everything.
Fast, easy, and perfect for a busy weeknight:
Using pre-cooked or shredded chicken (hello, rotisserie chicken hero!) makes this recipe almost effortless. You’re just mixing, smashing, and pan-frying. From fridge to table in under 20 minutes, these tacos are the ultimate solution for a delicious dinner with minimal cleanup.
Ingredients for Dill Pickle Ranch Smash Chicken Tacos
2 cups cooked or shredded chicken
This is your protein base. Rotisserie chicken is the ultimate shortcut, but leftover grilled or baked chicken works perfectly too. The shreds soak up all that delicious pickle-ranch flavor.
1/2 cup dill pickles (finely chopped)
The star of the show! Use your favorite brand of dill pickles. Finely chopping them ensures you get a little bit of that briny crunch in every single bite of the filling.
2 tablespoons pickle juice
Don’t you dare skip this! The pickle juice is where all the magic lives. It adds an intense tang and moisture to the chicken mixture that dry pickles just can’t provide.
2 tablespoons ranch seasoning mix
This is your flavor shortcut to creamy, herby perfection. You can use a store-bought packet or make your own blend with dried dill, parsley, garlic powder, onion powder, and a touch of buttermilk powder.
1 cup shredded cheddar or mozzarella cheese
This is what creates the glorious crispy cheese crust. Cheddar gives a sharper, more pronounced flavor and a deep golden color. Mozzarella is milder and gets incredibly stretchy and bubbly. Feel free to mix them for the best of both worlds!
6 small flour or corn tortillas
Choose your favorite. Flour tortillas are soft and pliable, while corn tortillas offer a more rustic, authentic flavor and a pleasing chew. Make sure they are small (street taco size) so they are easy to flip and manage.
Optional Toppings
Shredded lettuce, diced tomatoes, sour cream or ranch dressing, thinly sliced red onions, and fresh dill for a beautiful finish.
(Note: the full ingredient list with quantities is provided in the recipe card just below.)
Variations
Spicy Buffalo-Style Twist:
Craving heat? Add 1-2 tablespoons of your favorite buffalo wing sauce to the chicken mixture along with the ranch seasoning. The tangy, spicy buffalo flavor pairs amazingly with the dill pickles. Garnish with a drizzle of blue cheese dressing instead of ranch.
Vegan & Plant-Based Version:
Make it fully plant-based by using shredded jackfruit or a high-quality plant-based chicken substitute in place of the chicken. Use a vegan ranch seasoning and your favorite vegan shredded cheese (many cheddar-style shreds melt beautifully). The pickle flavor ensures no one misses the meat!
Crispy Chicken Cutlet Style:
Instead of shredded chicken, use thin chicken cutlets or tenders. Cook them first in a little oil until golden, then shred them. This adds another layer of texture and a slightly different, more substantial chicken flavor that breaded chicken lovers will adore.
How to make Dill Pickle Ranch Smash Chicken Tacos
Step 1: Prepare the Chicken Mixture
In a medium-sized bowl, combine your 2 cups of shredded or cooked chicken, the ½ cup of finely chopped dill pickles, the 2 tablespoons of pickle juice, and the 2 tablespoons of ranch seasoning mix. Use a fork to mix everything together until the chicken is evenly coated and the mixture looks creamy and well-combined. Set it aside while you prepare your pan.
Step 2: Smash the Chicken onto Tortillas
Take one of your small tortillas and lay it flat on a cutting board. Spoon about 2-3 tablespoons of the chicken mixture onto one side of the tortilla, leaving a small border around the edge. Use the back of the spoon or your fingers to spread it out into a thin, even layer. Press it down firmly so it “smash” adheres to the tortilla. This is the “smash” effect that gives the taco its name and ensures every bite has a bit of filling.
Step 3: Add Cheese for the Crispy Delight
Heat a large non-stick skillet or frying pan over medium heat. You don’t need any oil. Once the pan is hot, sprinkle a generous pinch of your shredded cheese directly onto the pan in a thin, even layer. Make it slightly larger than the circumference of your tortilla. This will form the crispy cheese crust that extends beyond the tortilla.
Step 4: Cook the Taco Base
Carefully place your assembled tortilla (with the chicken mixture facing up, away from the cheese) directly on top of the melting cheese in the pan. Let it cook undisturbed for 2-3 minutes. You’ll know it’s ready when the cheese has melted, turned a deep golden brown at the edges, and is completely crispy and lacy underneath. Don’t rush this step—the color is your best indicator of that perfect crunch.
Step 5: Flip and Finish
Using a thin, sturdy spatula, carefully lift the taco from the pan. The cheese should be holding it all together. Flip it over so the tortilla side is now down in the pan. Cook for another 1-2 minutes until the tortilla is lightly toasted, golden brown, and a little crispy. This step ensures the whole taco is warm, crispy, and ready to hold up to all your toppings.
Step 6: Add Toppings and Serve
Remove the taco from the pan and transfer it to a plate. Immediately top it with your favorite garnishes. A handful of shredded lettuce adds freshness, some diced tomatoes bring sweetness, a drizzle of sour cream or extra ranch dressing cools things down, and a sprinkle of fresh dill and sliced red onions make it beautiful. Serve immediately while the cheese is still warm and crispy!
Tips & Tricks
Always use a non-stick pan for the best results:
A high-quality non-stick skillet is your best friend for this recipe. It ensures the cheese doesn’t stick and that beautiful, lacy crust releases easily from the pan. If your pan is old or scratched, consider using a well-seasoned cast iron skillet with a little extra butter or oil.
Don’t overcrowd the pan, work in batches:
Your pan needs room for the cheese to spread and crisp up evenly. If you try to cook two tacos at once in a small pan, the cheese will steam instead of fry, and you’ll lose that essential crunch. Cook one taco at a time or use a larger pan to fit two, giving them each at least an inch of space.
Let the cheese get truly golden before you flip:
Patience is key here. The cheese needs to reach a deep, golden-brown color to become perfectly crispy. If you flip it too early while it’s still pale and just melted, it won’t be crunchy and will likely stick to the pan. Watch the edges turn dark amber—that’s your cue to flip.
How to serve
Build a taco bar for a fun family dinner:
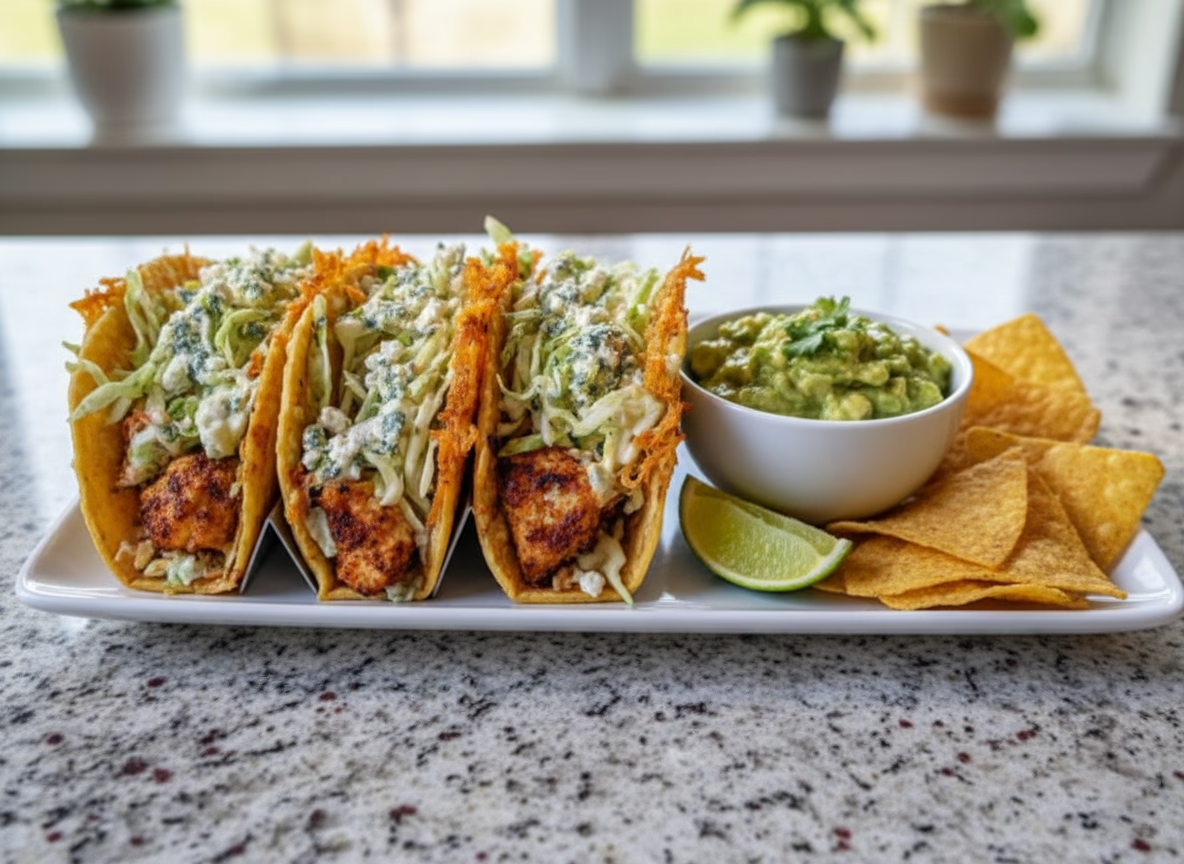
The best way to serve these crispy delights is to set up a taco bar. Have the cooked tacos kept warm on a platter, and let everyone build their own with bowls of shredded lettuce, diced tomatoes, sour cream, sliced jalapeños, and fresh lime wedges. It’s interactive and fun for all ages.
Serve them alongside a cool and creamy side salad:
The tangy, crunchy tacos are perfectly balanced by a simple, cool side dish. A creamy coleslaw with a yogurt dressing, a classic cucumber and tomato salad with red wine vinegar, or even a scoop of tangy sour cream and onion potato salad would be spectacular.
Pair them with a refreshing drink for the ultimate meal:
These tacos cry out for a crisp, cold beverage. An ice-cold Mexican lager like Modelo or Corona is the classic choice. For a non-alcoholic option, try an iced tea with a squeeze of lemon or a sparkling water with a splash of pickle juice (trust me, it’s amazing) for a real “pickleback” vibe.
Make-ahead & storage
Prepare the chicken mixture up to two days in advance:
This is a fantastic time-saver. You can mix the shredded chicken, pickles, pickle juice, and ranch seasoning up to 48 hours before you plan to cook. Store it in an airtight container in the refrigerator. The flavors will actually meld and become even better over time. Just give it a good stir before using.
Freeze the prepped chicken mixture for instant meals:
This recipe is perfect for meal prep. Make a double batch of the chicken mixture and freeze it in a freezer-safe bag or container for up to 3 months. When you’re ready for tacos, simply thaw it in the refrigerator overnight. The mixture thaws beautifully and is ready to be smashed onto tortillas in minutes.
Reheat leftover tacos in a pan for crispy revival:
If you have leftover cooked tacos (they won’t last long!), don’t use the microwave—it will make the cheese soggy. Instead, reheat them in a dry non-stick skillet or air fryer at 350°F for 2-3 minutes per side. This will bring back most of the original crunch and make them taste freshly made.
FAQ
1. Can I use pre-made ranch dressing instead of the seasoning mix?
You can, but the texture and flavor will be different. The seasoning mix is a dry powder that coats the chicken without adding extra liquid, which helps the mixture stay thick and spreadable. If you use wet ranch dressing, your filling might be too loose and cause the tortilla to get soggy. We strongly recommend the seasoning mix for the best “smash” result.
2. What if my cheese isn’t getting crispy?
This usually happens if your pan isn’t hot enough or if the cheese is spread too thickly. Make sure your pan is fully preheated over medium heat before adding the cheese. Also, use a light, even sprinkle of cheese—too much will just melt into a puddle rather than forming a thin, crispy lace. Give it time to turn a deep golden brown before flipping.
3. Can I use a different type of cheese for the crispy crust?
Absolutely! While cheddar and mozzarella work wonderfully, you can experiment. Parmesan or Pecorino Romano will create an even crispier, more delicate crust with a salty, nutty flavor. Monterey Jack melts beautifully and is very mild. A mix of cheddar and Gruyère would be absolutely decadent. Just avoid very soft, high-moisture cheeses like fresh mozzarella.
There you have it, friends! The ultimate Dill Pickle Ranch Smash Chicken Taco with that blissfully crispy cheese edge. They are everything you want in a weeknight dinner: fast, fun, and full of incredible, tangy flavor. I promise you, once you make these, you’ll be looking for excuses to use leftover pickle juice. So get that pan hot, shred that chicken, and get ready to fall in love with your new favorite taco. Happy cooking!
Dill Pickle Ranch Smash Chicken Tacos with Crispy Cheese
Description
A fun, fast, and incredibly flavorful taco where shredded chicken is smashed onto tortillas with a tangy dill pickle-ranch mixture, then pan-fried with a crispy, golden cheese crust.
Ingredients
- 2 cups cooked or shredded chicken
- 1/2 cup dill pickles (finely chopped)
- 2 tablespoons pickle juice
- 2 tablespoons ranch seasoning mix
- 1 cup shredded cheddar or mozzarella cheese
- 6 small flour or corn tortillas
- Shredded lettuce (for topping)
- Diced tomatoes (for topping)
- Sour cream or ranch dressing (for topping)
- Red onions, thinly sliced (for topping)
- Fresh dill (for topping)
Instructions
- 1In a bowl, combine shredded chicken, chopped dill pickles, pickle juice, and ranch seasoning. Mix well.
- 2Take a tortilla and spread a thin, even layer of the chicken mixture onto one side. Press down firmly.
- 3Heat a non-stick pan over medium heat. Sprinkle shredded cheese directly onto the pan in a thin layer, slightly larger than the tortilla.
- 4Place the tortilla (chicken side up) onto the melting cheese. Cook for 2–3 minutes until the cheese is golden and crispy.
- 5Carefully flip the taco and cook the other side for 1–2 minutes until the tortilla is lightly toasted.
- 6Remove from the pan and add your favorite toppings like lettuce, tomatoes, or an extra ranch drizzle. Serve immediately.
Did you try this recipe?If it worked for you, don’t forget to share it with your friends and family — it might become their new favourite too!